Selecting your EDIN data
Available well-based tables will depend on the data category. For example, for EDIN Well Data there are 19 tables to select from, whereas for EDIN Production Data there is only 1 table.
-
In the Select Data dialog box, first select the Well-Based Tables. All available tables for the selected data source are listed.
-
Then define your Well Query to focus on the well set you want to load. The attributes are organized by type: Categorical Data | Numerical Data | Dates, although not all tables will have all 3 types. You can search across all types or expand the type, search, and select the attributes you want, and add selected attributes to the query.
-
Select the attributes that you want to include and Add them to the query. The number of wells that satisfy the query are displayed at the top of the query box.
-
When you have created your well query, click Load. You can view the progress of the load operation through the displayed status dialogs.
-
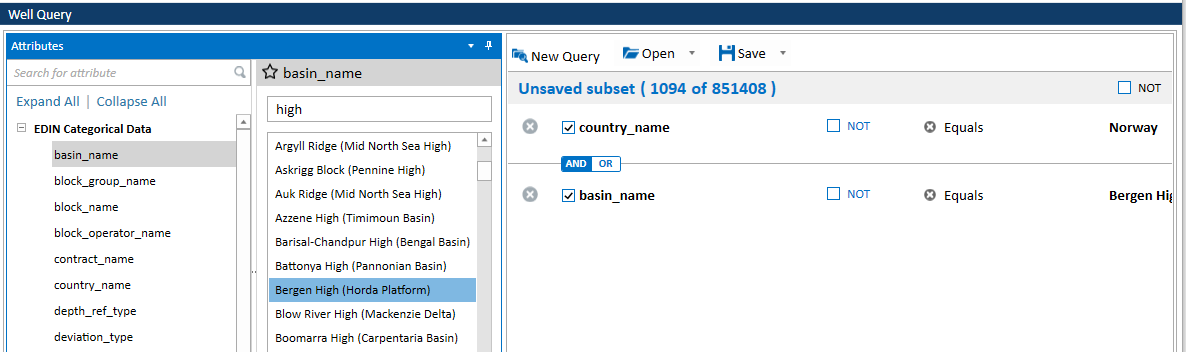
The figure above displays a query of EDIN well data for the Bergen High basin in Norway: 1094 wells out of 851408.
Any spatial data will be automatically added as layers to the map. Any required coordinate conversions are automatically applied. During the conversion process, you will see a dialog, Calculating wkb column with the following message:
Calculating wkb column to display spatial geometry on a map
This process may take a minute or two depending on the size of the data layers.
If you encounter errors, see Handling loading errors.