|
Raster logs often have curved or distorted images from paper stretch or misalignment of the original paper log during the scanning process. Crooked images can create problems when displaying raster images on the Cross-Section or Log Correlation modules.
Getting Started with Depth Calibration Points
Petra uses depth calibration points as "nodes" that set the location of the straight edge. When you straighten an image, you generally want the header and scale information to be straightened as well. Since image straightening works at each depth calibration point, its a good idea to add a fake depth point above the header and below the footer information before straightening. Once the image is straightened, you can always delete these fake depth calibration points. Depending on the image, you can use a couple of different strategies.
First, create a good set of depth calibration points - generally, most images will only need a few points to accurately capture the depths. Next, add a fake depth calibration point above the header and another fake point below the footer. This ensures that when we straighten the image, we also straighten the header and footer. For raster logs with multiple runs and scales, you'll need a set of depth points over the entire raster log.
Adding a Straight Edge
To straighten an image, select the  button on the on the toolbar or select Edit>Add Track Straight Edge
on the menu bar at the top of the Raster Image Calibration tool. button on the on the toolbar or select Edit>Add Track Straight Edge
on the menu bar at the top of the Raster Image Calibration tool.
The straightening process involves defining a "Track Straight Edge" along the leftmost track edge. This straight edge is a multi-segmented line connected to each calibration depth marker.
The Track Straight Edge is identified with a series of control points located at the intersection of each calibration depth. You can, and should, move these control points to align the boundary segments with the image tracks. The control points can be moved using the left mouse button. Now you see why we generated a small number of depths. We only need enough depth points to define the track straight edge segments. You can always add more depth points if the track straight edge can not be manipulated to align completely with the image.
Next, click to set a straight vertical line on top of one of the vertical lines printed in the raster image. Though this tool suggests the left side of the depth track, any consistent vertical line will work. Petra will generate a straight line with node points at every one of the depth calibration lines.
Next, drag each node point so that it accurately covers the crooked line on the log; if you find that you need more nodes, simply add another depth registration point.


Finally, click on the Straighten Image button on the toolbar at the top of the screen:  or go to Edit>Straighten Image Edges
on the menu bar. or go to Edit>Straighten Image Edges
on the menu bar.
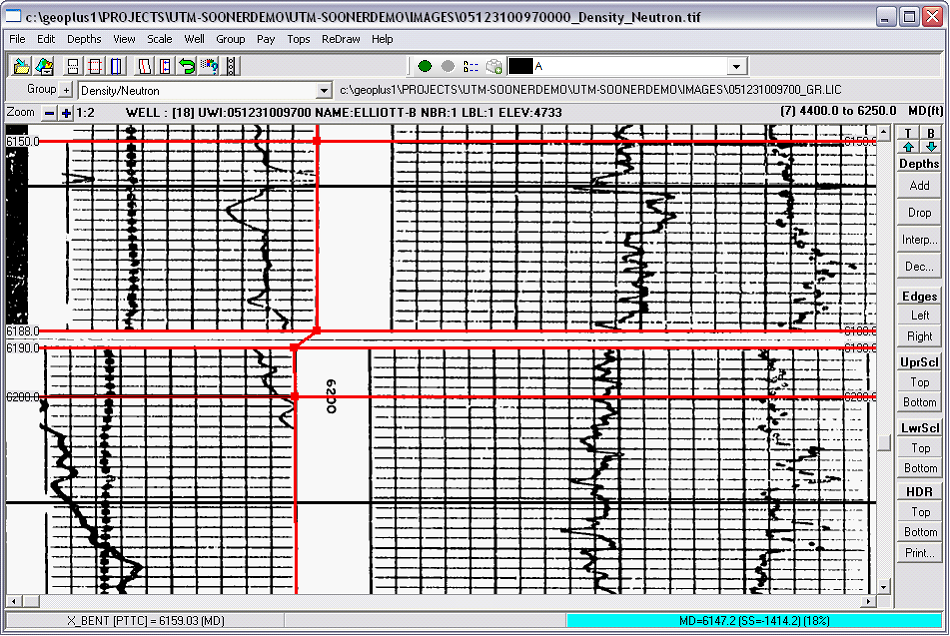
In the example below, notice how the image is crooked. The crooked interval is bracketed off with depth markers at 6188 and 6190, and a straight edge is added.
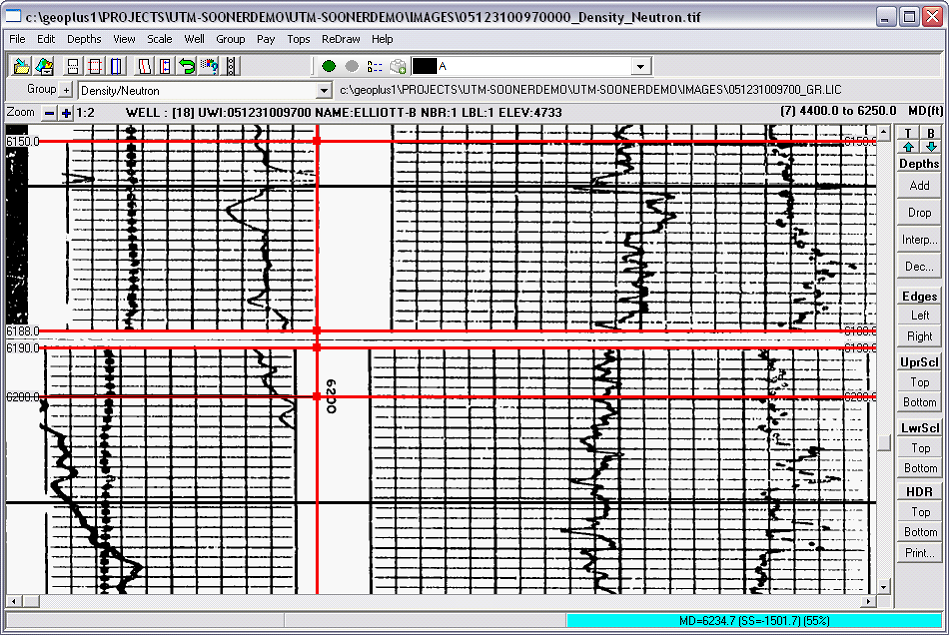
Next, the straight edge nodes are moved to fit the left track edge.
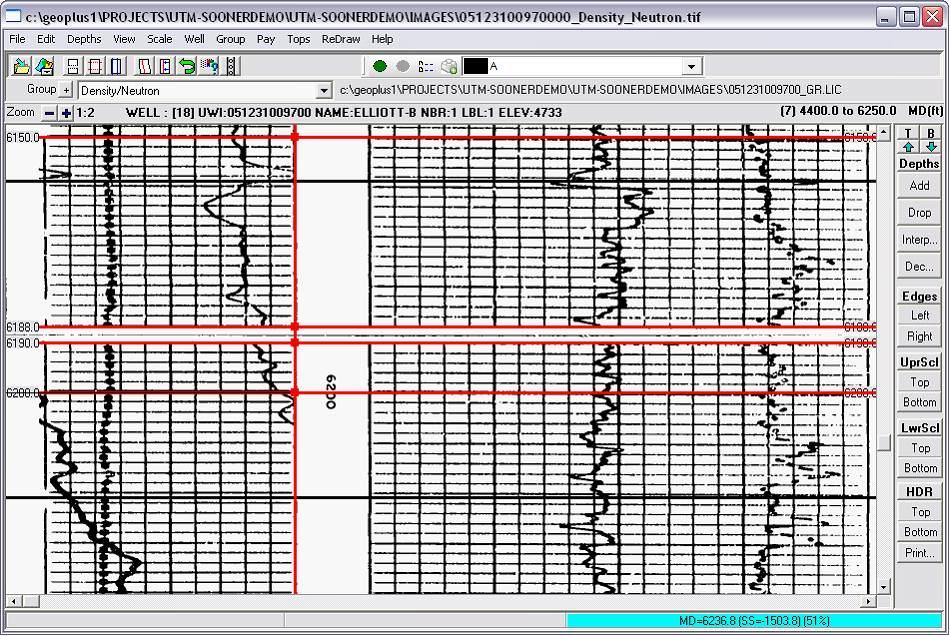
Finally, by clicking Straighten image, Petra moves parts of the image to bring the straight edge into alignment.
Saving your changes
Straightening the image makes changes to the image file. Depending on the situation, you can either overwrite the existing image file or create a new version. To save an image, select the  button on the toolbar, or select File>Save Image As
on the menu bar. button on the toolbar, or select File>Save Image As
on the menu bar.
To add the Track Straight Edge, choose the Edit->Add Track Straight Edge menu option. Align the vertical cursor with the left edge of the LEFTMOST log track and click the left mouse button.
The straightened image must be saved back to disk as a TIFF file. You should create a new file. Do not write over your original image
At this point you may choose to clear the artificial depth calibrations and proceed with normal calibration. Refer to the Depth Calibration section for details. Or you can exit without saving your calibrations. What ever you do, DO NOT save over a good calibration file with the artificial depths used for straightening.
|