Introduction to Log Names and "Log Types"
The fundamental problem with log data is the proliferation of log names created by different commercial data vendors and individual users. The same general type of curve can have hundreds, if not thousands, of different names in a single project.
The Log Correlation Tool gets around this problem by using "Log Types." A Log Type is just an alias list of equivalent logs. In the example below, the "Resistivity" Log Type we build will contain a list of the resistivity raster logs in a project. To display a resistivity curve on a cross-section, we simply tell Petra to draw the "Resistivity" Log Type. Petra then goes down this list of raster logs for each well on the cross-section and draws the first one it finds. For the interpreter, this means that time invested in setting up Log Types will pay off with quicker, easier cross-sections later.
Assign Log Type Window
The next step is to put raster logs inside the newly defined tracks. Practically, this means that we need to assign raster group names to the Log Types. In the main screen, select one of the defined tracks under Step 3. In this example, the center track with the Resistivity Log Type is selected.
This brings up the Assign Log Type screen. This screen shows the available raster logs and their start and stop depths for each well in the Log Correlation Tool. Shading separates different wells. You can sort by ascending or descending order for each column.
This screen also features a search box at the top of the screen that filters data by WSN, UWI, well name, well label, log name, or start and stop depths. Select "Filter" to return the data meeting the criteria. This filter can also be made sensitive to capitalization by selecting the "Case Sensitive Filter" box. After narrowing your logs and wells by applying one filter, you can select different criteria and select "Filter" again to further limit the results. "Clear Filter" removes all filtering and returns all the available raster logs for all selected wells.
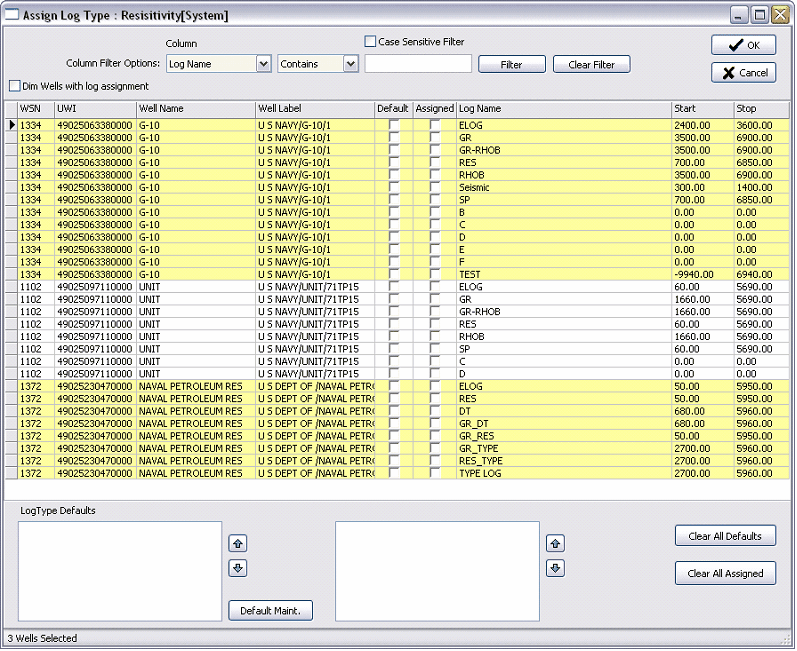
You can select raster logs for the wells either by aliasing default raster groups to a Log Type or by individually assigning raster logs for each well. Using both approaches together will give the best combination of speed and customization. A good Log Type default list is a useful way of making a quick first pass at the proper raster log for each well, while assigning individual logs can ensure that you are displaying the best possible log.
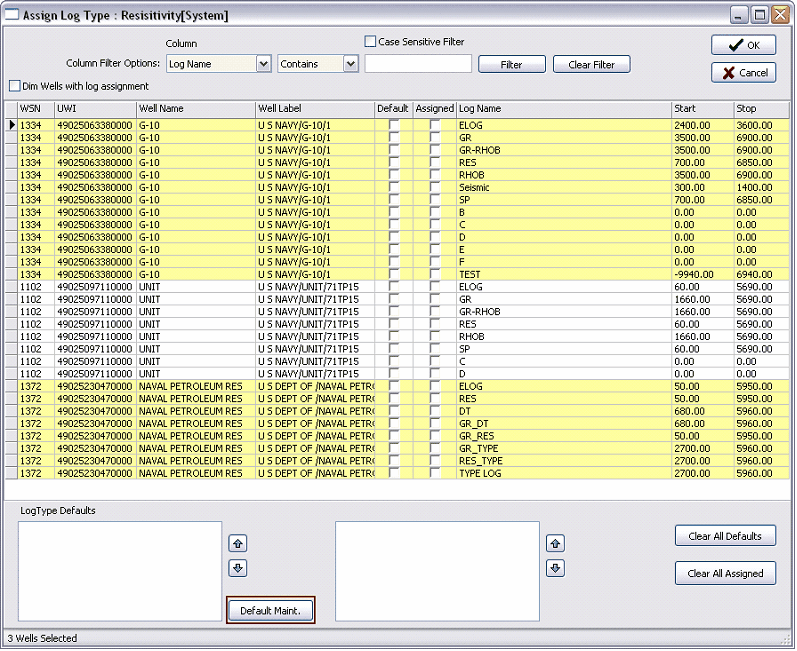
"Default" Log Type Rasters This method aliases different raster groups to one Log Type. Petra then assigns a "default" raster log to the well based on this list. In this example, different resistivity raster images will be aliased to a single default "Resistivity" Log Type. The first step to setting up a Log Type is to select the Default Maintenance button on the lower left side of the screen (highlighted in red).
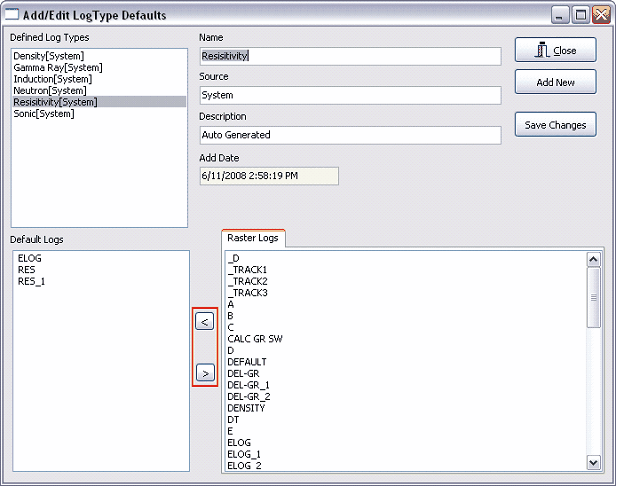
This brings up the Add/Edit Log Type Defaults screen. Here you can add, delete, or modify the existing Log Types. In this example, the Resistivity type is selected in the "Defined Log Types" box in the upper left corner. Next, select the raster names to add to the Log Type. To add or remove raster names to the Log Type, select the "<" or ">" buttons (highlighted in red). In the example below, the Resistivity Log Type will bring up the log, Res, and Res1 raster logs as a default. In essence, Petra will try to draw the first available raster log on this list for the Resistivity Log Type in the center track. Click Save Changes and Close to exit.
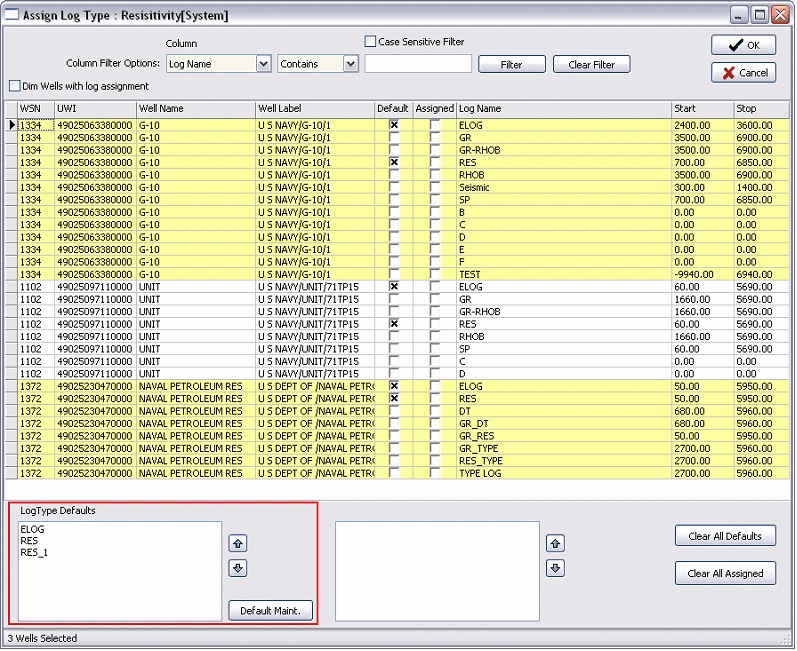
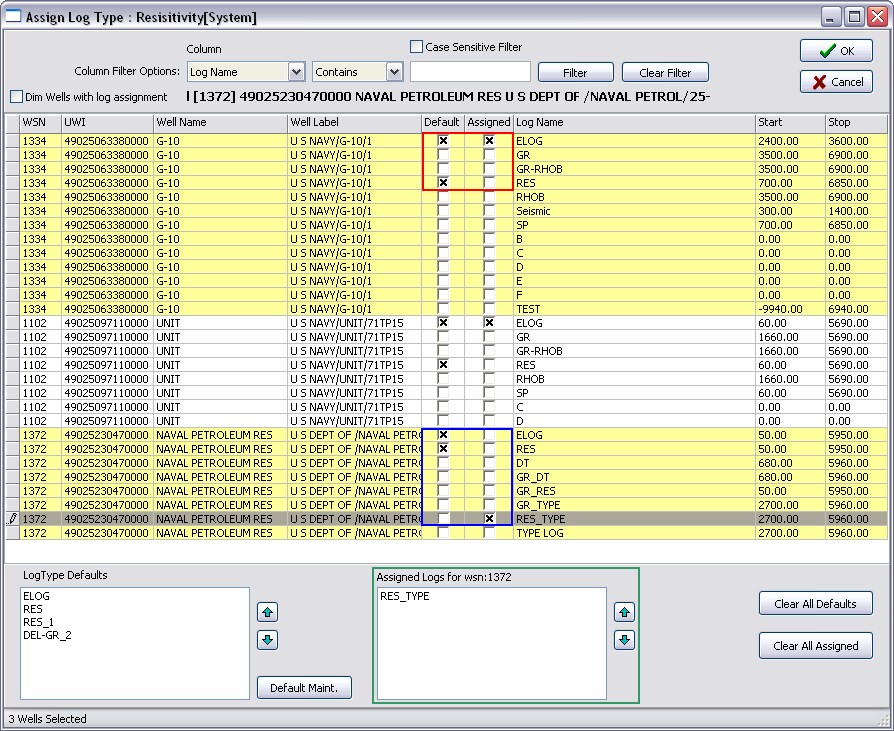
Back at the Assign Log Type screen, notice that the raster logs selected on the default Log Type list now show checks in the boxes underneath the "Default" column. In addition to showing which logs are selected, these check boxes can also be used to quickly add and drop logs from the selected Log Type. For example, clicking the "Default" check box next to the "ELOG" raster log will drop it off the "Resistivity" Log Type for all wells. Clicking the same "Default" check box again restores it to the list. The Log Type Defaults list (highlighted in red below) shows the order of the default logs for the selected wells. Again, log names higher on the list will be drawn before log names lower on the list. To change the priority of the alias list, select a log name and use the
 and and
 buttons. buttons.
"Assigned" Individual Raster Logs - The other way of selecting raster log names to display is to individually assign raster logs for each well. Though this process takes more time, assigning individual logs allows you to select the best raster log for each well. Petra stores this information for the next time you bring the well into the Log Correlation tool.
The easiest way to assign a specific raster log to a well is to use the Assign Log Type screen. To select a specific raster log, select that raster log's check box in the "Assigned" column.
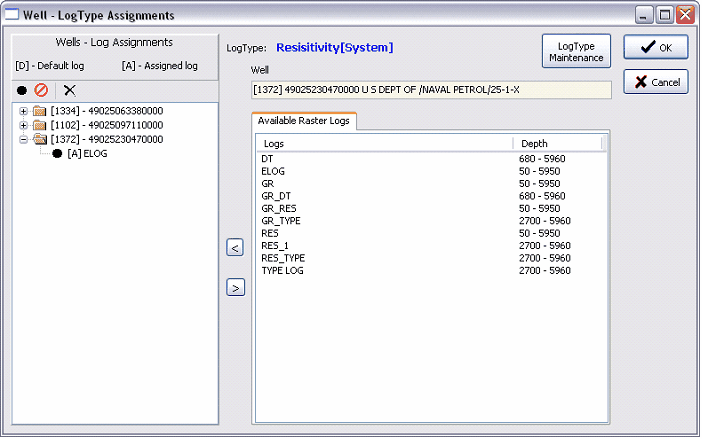
Additionally, you can also open the well-specific "Log Type Assignments" box by double-clicking an individual well. To assign a raster log to the selected well, select the specific raster log from the "Available Raster Logs" list on the right side of the screen and click the "<" button. In the example below, the "ELOG" raster has been assigned to the selected well. Select OK to save the changes and return to the main "Assign Log Type" screen.
In the example below, notice that the two different wells have "assigned" logs. In one case (highlighted in blue), the log RES_TYPE will be plotted instead of the two default logs, RES and ELOG. In the other case (highlighted in red), ELOG is both a default log and an assigned log. This just means that it will be displayed regardless of its order in the default Type Log list.
The Assigned logs box (highlighted in green below) shows the assigned logs for the selected well. If a well has multiple assigned logs, you can prioritize them with the
 and and
 buttons. Log names at the top of the assigned logs list will be shown before log names at the bottom of the list. buttons. Log names at the top of the assigned logs list will be shown before log names at the bottom of the list.
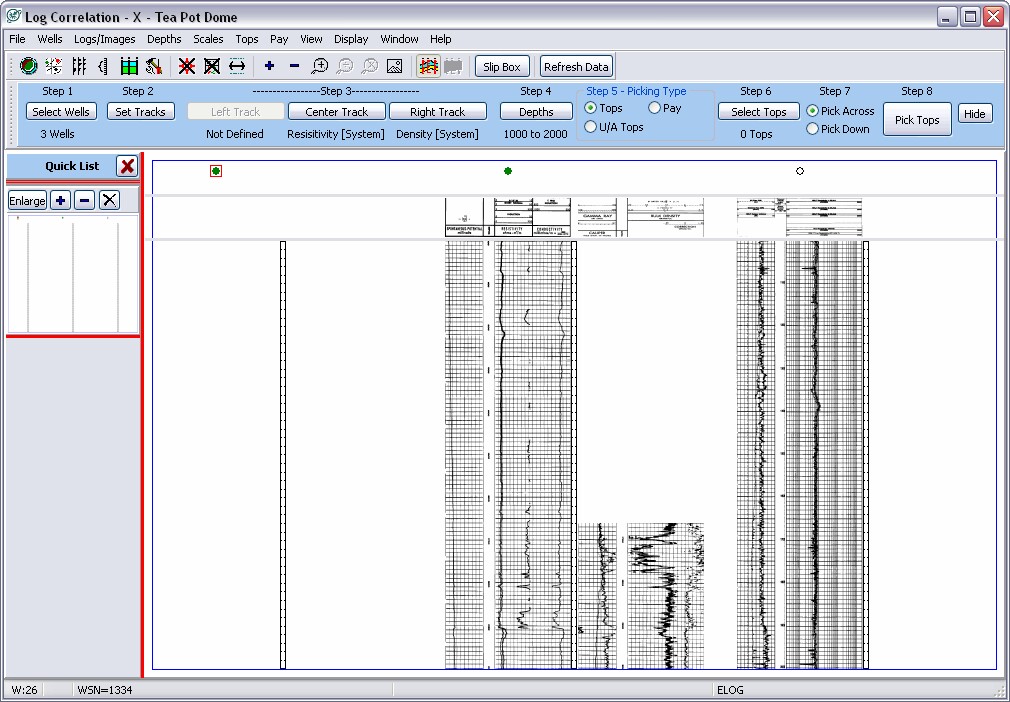
After setting up one Log Type, this is a good place to go back and repeat the same Step 3 in order to fill the log types established for the columns in step 2. Carrying on with the example, the screenshot shows the results of setting up log types for resistivity and density logs. Notice that the far left well does not have a log. This is because the depth scale is still from 1000-2000' MD, which is above the start of that well's raster logs. After setting up log types, the next step is to move our focus down to the interval of interest, the 2nd Wall Creek formation.
|