Map: Options > Highlight Symbols...
This function highlights wells with special well symbols, marker symbols, or picture files. Optionally, each group of wells can have data items posted around the well location. Each group of selected wells is identified using a Well Sequence Number (WSN) list file. A maximum of 25 separate groups can be defined with different properties, such as, symbol type, symbol style, description and data posting.
Defining Well Groups
Begin with the Wells tab and proceed through each of the other tabs. Then click the "Add" button to add the group to the list. Each defined group is listed by symbol and description. A generic 'GAS' symbol is used for groups which use the current well symbol. Click the "Replace" button after making a change to a previously defined group. Drop a single group using the "Drop" button or remove all groups using the "Clear All" button.
Set the "Active" check box to the off state to disable previously defined highlight symbols but retain the template for later activation.
Wells tab
The Wells tab just selects the WSN list for each symbol highlight.
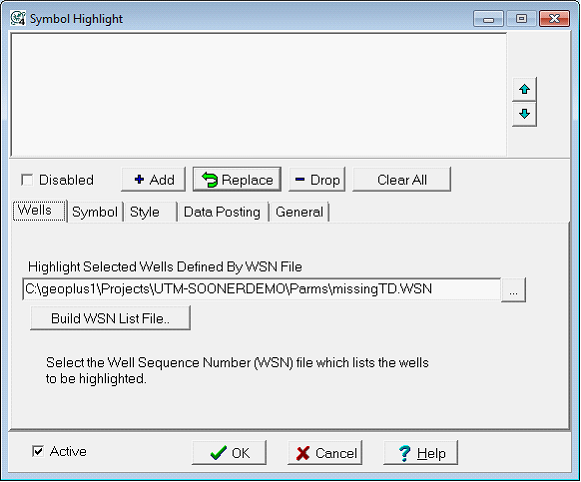
Hightlight Selected Wells Defined by WSN File - Use the browse button ('...') to find and select the WSN file which identifies the wells to be highlighted.
Build WSN List File... - This button opens the Select Wells By Data Criteria tool. Here, select wells with the desired criteria, and save a new WSN list file. It's probably best to save the WSN list to a safe, regularly-backed-up location.
Symbol tab
This tab selects the actual symbols around the wells on the Map Module.
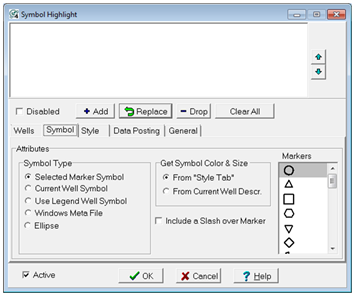
Symbol Type
Click on one of the symbol type options listed below.
Selected Marker Symbol - Use this option when you wish to have a large circle, triangle, square, etc. plotted on top of the normal well symbol. The marker symbol is chosen from the "Markers" list box.
Current Well Symbol - Use this option when you want color-coded well symbols. Each well is plotted using the current well symbol. The color and size of the well symbol will be set by the symbol size and style attributes.
Windows Meta File - This option will plot a picture file in the Windows Meta File format, (emf or wmf), at each well location of the group. It will be sized using the symbol size attribute. Meta files are created external to Petra.
Get Symbol Color & Size
The symbol size mode attribute determines whether to use a user-defined size or the size of the current well symbol.
From "Style tab" - Means to use the symbol size defined on the "Style tab". Sizes are given in XY map units, i.e., feet or meters. Use this option when placing larger marker symbols over the well symbol.
From Current Well Descr. - Means to make the highlight symbol the same size as the current well symbol. Use this option along with the "Current Well Symbol" option to show color-coded well symbols.
Markers
This list sets the actual marker plotted around the selected WSN list.
Include a Slash over Marker - This option puts a slash over the selected marker. This can be useful for marking wells that fail some sort of criteria, such as wells that are too shallow or that failed to produce out of an interval.
Style tab
This tab sets additional symbol properties, including a description and color.

Description - Enter a short text string that describes the group of highlighted wells. This text will appear in the legend.
Color - This option sets the color of the highlight symbol. Click the small browse button ("...") to choose a color.
Use Color From Current Symbol - This option just uses the color of the well symbol.
Pen Width - This option determines the line thickness of the highlight symbols. Choose from narrow to extra wide.
Symbol Size (Map Units) - Specify the height of the highlight symbol in XY map units (feet or meters).
Connect Highlighted Wells With A Line - This option draws a line between highlighted wells. This can be used as an alternative to the Display Selected Cross-Section Lines tool.
Data Posting tab
This feature allows data items to be posted for those wells in the group. Posting information is defined using a data posting template. The template must be created and saved under the data posting options located under the mapping Options>Data Posting menu.
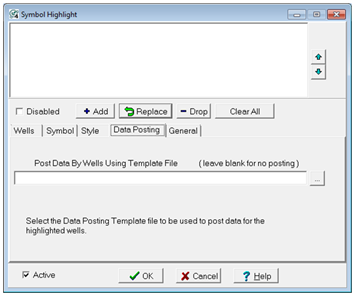
Post Data By Wells Using Template File - Click the small browse button ("...") to locate and select the data posting template file (.dbw). LEAVE BLANK to indicate you do not wish to post data for the group.
General tab
This tab defines properties relating to all groups.
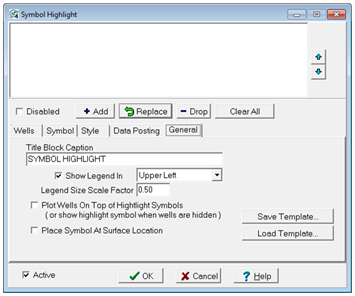
Title Block Caption - This text string will appear as the title for the highlight symbols legend. It can be left blank if not title is needed.
Show Legend in Upper Corner of Map - Check this option on to have a legend displayed in the upper left corner of the map. This legend is not shown in zoom mode. There is also a highlight symbols legend available on the map title block.
Legend Symbol Size Factor - Enter a multiplier scale factor greater than zero to adjust the size of the legend symbol and text. For example, a size factor of 0.5 will make the legend data 1/2 scale. A size factor of 2.0 will make the legend data twice as large.
Plot Wells on Top of Highlight Symbols - This option causes the highlight symbols to be plotted prior to plotting the well symbols so that the well symbols will not be covered up by the highlight symbols.
Save Template - You can save the highlight symbol settings for later retrieval.
Load Template - You can load previously saved highlight symbol settings.
Related Topics
Positioning the scale bar and symbol hilite legend
|