|
Petra has the option to create and display up to three custom toolbars for both the Main and Cross Section modules. All custom toolbar settings are stored in the client Parms folder in a file named tbSettingsMain.def. This file can be copied to other clients/computers. Deleting this file returns Petra to it's default state with no custom toolbars or commands configured.
Adding a custom toolbar is an easy three step process:
·Enable a custom toolbar
·Set the location of the toolbar
·Select command items to the tool bar
To add a custom toolbar:
From the main module.
1.Click, View>Custom Toolbar # >Enabled.
2.Select the toolbars location (Top or Left side).
·View>Custom Toolbar # > Doc Top
·View>Custom Toolbar # > Doc Left
3.Add command items to custom toolbar.
a)Click  button on the empty custom toolbar and select Options>Customize Custom Toolbar. button on the empty custom toolbar and select Options>Customize Custom Toolbar.
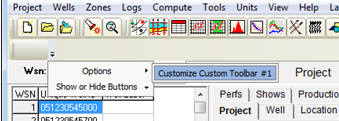
The custom toolbar dialog will open.
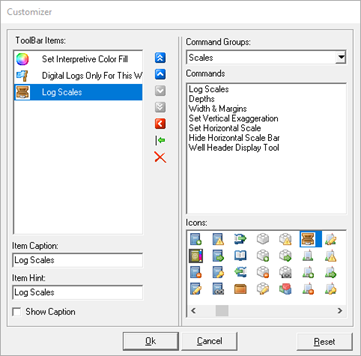
b)Use the dialog to add menu items and settings to the custom toolbar.
|
Toolbar Items
|
List of added toolbar commands.
|
|
Command Groups
|
Drop down list of command groups available for custom toolbars. Populates Commands list with available command items.
|
|
Commands
|
List of available items for selected command group. Use window controls on side of list to edit item positions on toolbar
|
|
Icons
|
Select icon to display for selected command item.
|
|
Item Caption
|
Name of command. Label can be edited from default.
|
|
Item Hint
|
Fly over help label. Optional
|
|
Show Caption
|
Toggles item caption on/off
|
To remove a custom toolbar:
·Temporarily disable a single toolbar, Uncheck: View>Custom Toolbar # >Enabled.
·Temporarily disable all custom toolbars, View>Reset to Default View.
·Permanently delete all custom toolbars, Delete file "tbSettingsMain.def" in client Parms folder.
|