Displaying and Editing Slip Log Tops |
|
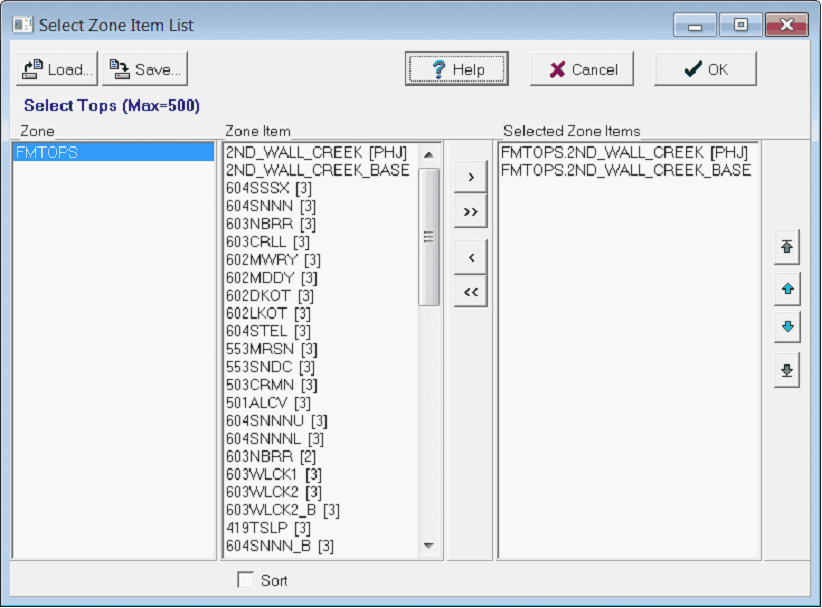
The first step to working with tops in the Slip Logs Module is to select the tops to display. A project can contain hundreds of tops, so this tool can be useful for filtering the list down to only the most relevant formation tops. To select the tops to display on the Slip Log Module, select Tops>Select Tops to open the Select Zone Item List tool.
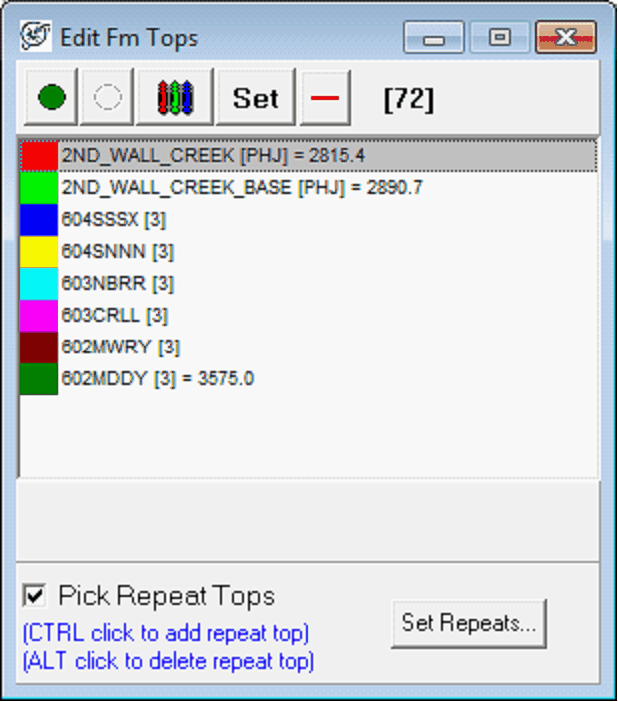
Select the desired tops on the by selecting formation top names from the "Available Items" list and adding them to the rightmost "Selected Items" list. To add one or more selected item names, highlight the names and click the ">" button. You may add all items from the "available" list by clicking the ">>" button. Items may also be added by double clicking the name in "available" list. To remove a top from the the "selected" list, highlight the desired top and select the "<" button. To clear all tops from the list, select the "<<" button. Editing TopsOnce tops are displayed on the Slip Log Module, select Tops>Show Tops on the menu bar at the top of the screen or select the
|

 button on the toolbar to edit tops.


 - This button changes the color of the selected top.
 - This option manually sets the MD of the selected top.
 - This option aligns the logs on the selected top. This can be useful for quickly picking tops relative to a common, easily correlated top across a field.