|
To switch to picking Fm tops, first select the "Tops" option on the Picking Type box on the Guide at the top of the screen.

This changes the Quick List to Pick Tops mode.

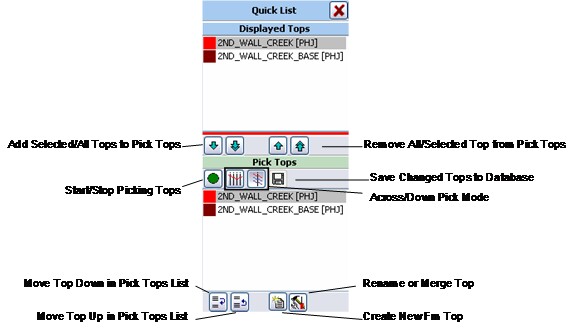
To start picking tops, first select the desired fm top on either the Displayed Tops list at the top or the Pick Tops list at the bottom. Next, select the "Pick Tops" button on the guide:  or the green button on the Pick Tops Quick List: or the green button on the Pick Tops Quick List:  . .
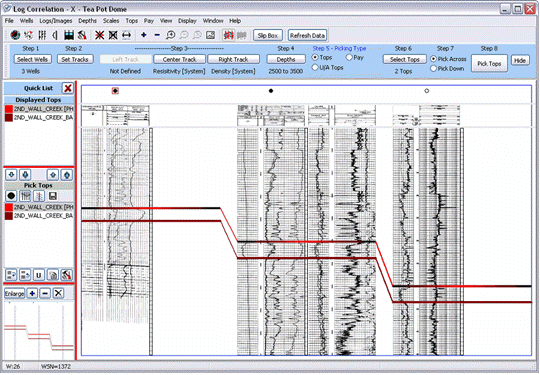
Remember that the two pick modes work differently. "Pick Across" creates a single top across all wells, while "Pick Down" cycles through the Pick Tops list. To create fm tops, just click the depths on the raster logs where your tops are located. To stop picking, right click the mouse or click the stop button on the Pick Tops Quick List:  . The example below shows formation tops for the top and base of the 2nd Wall Creek in red. Notice that the currently active Fm top, 2nd Wall Creek, is shaded to black. . The example below shows formation tops for the top and base of the 2nd Wall Creek in red. Notice that the currently active Fm top, 2nd Wall Creek, is shaded to black.

If working on fm tops, the next step is to select the tops you want to display and pick. First, select the "Tops" option under the Step 5, and then click the "Select Tops" button under Step 6 on the guide (highlighted in red).

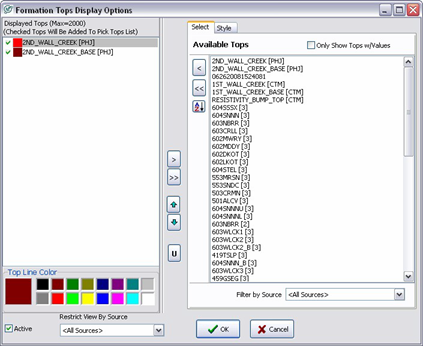
This brings up the Formation Tops Display Options window. To display a formation top in the Log Correlation Tool, first select it on the "Available Tops" list and click the "<" button to bring it over into the "Displayed Tops" list. The tops listed in the Available Tops list can be filtered to show only the tops with values for the wells in the Log Correlation tool or by source.
Once on the Displayed Tops list, you can change the color of the top as it shows up on the plot. The small check box next to the name on the Displayed Tops list toggles whether the picks are for display only or can be modified. Tops with a green check can be picked and shown up on the Pick Tops list, while those without a green check are display only.

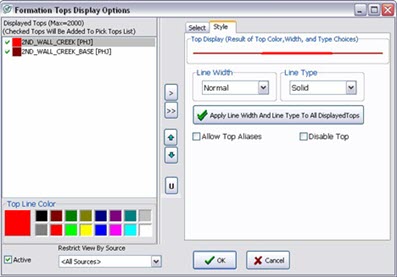
After the tops are selected, the next step is to pick the style of the displayed tops. Under the Style tab, you can change how the line between tops is drawn. Line width makes the lines between tops thicker and thinner, while the line type determines whether the line is dashed or solid. The "Apply Line Width and Line Type" button will change the width and type for every other displayed top, but will retain each line's color. In the example below, the "2nd Wall Creek" top is selected. The style tab shows that this top is red, solid, and of normal width.
If your project has Top Aliases set up in the Main Module, click the "Allow Top Aliases" to use them.
"Disable Top" temporarily hides the specific formation top on the cross-section while retaining its display settings. Disabled tops will have a  symbol next to their name. symbol next to their name.

|