|
Data tab
|
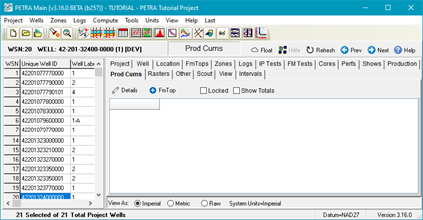
The Data tab changes individual data for a specific well. This includes changing the formation name, top and base, dates, and production cums.
|
|
Fixed Column Labels
|
The Fixed Column tab changes the names of the columns as they appear on the Prod Cums tab. Most users will want to leave these alone.
|
|
User Column Names
|
The User Column Names tab sets the column definitions for the user column names. Here, select the desired column and change the name and type. Note that numerical fields can have a set number of decimal places
|
|
Options
|
The Options tab sets options for:
-
Substitute FMNAME when ALTNAME is BLANK - Replaces missing entries for altnames with the formation name.
-
Date Format - Selects how Petra displays dates. By default, Petra uses mm/dd/YYYY
|
|
Advanced tab
|
Performs additional maintenance tasks, including global PdCum deletion and locking wells.
-
Global Deletion - Deletes all PdCum entries with a set FmName. Note that the name must match exactly.
-
Locks - Locks and unlocks the PdCum entries for the selected wells.
-
Set ZERO Top and Base Values to NULL - Replaces PdCum tops and bases with "0" values to a null. This can be useful for eliminating erroneous calculations involving depths.
|
|
Report tab
|
The Report tab creates CSV file of PdCum data.
-
To add a data column to the report, double-click the desired data field in the "Available Columns" list.
-
To remove a column, double-click the desired data field in the "Report Columns" list.
-
To rearrange the list in the Report Columns list, select the desired field, and use the up and down arrows to move the individual data field up or down. Entries on the top of the list will appear first (and to the left) on the CSV.
|
