Adding Overlay Contour Lines and Faults |
|
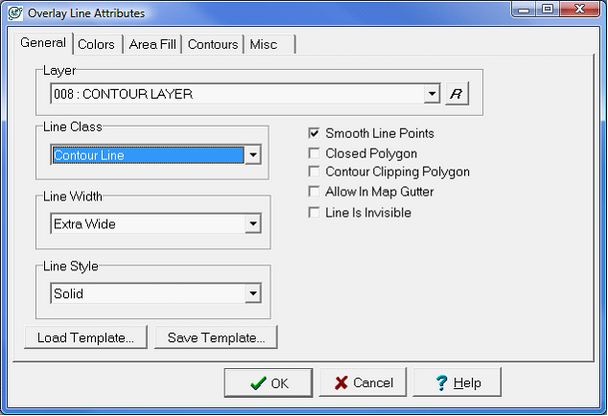
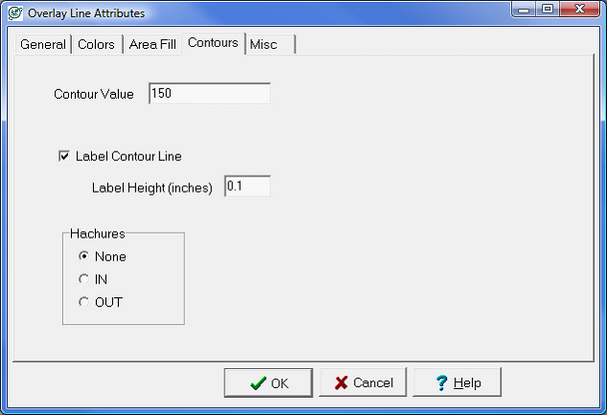
Use Overlay Contour Lines and Include Faults options on the Create Contour Grid tool's Data tab. Contour LinesHand-drawn contour lines are a great way to add geologic interpretation to a computer-generated grid. Since each line is assigned a value, Petras gridding tries to honor those values when creating a grid. Since Petra uses all the displayed contours when it grids, its a good idea to store each related set of contours in its own overlay layer.
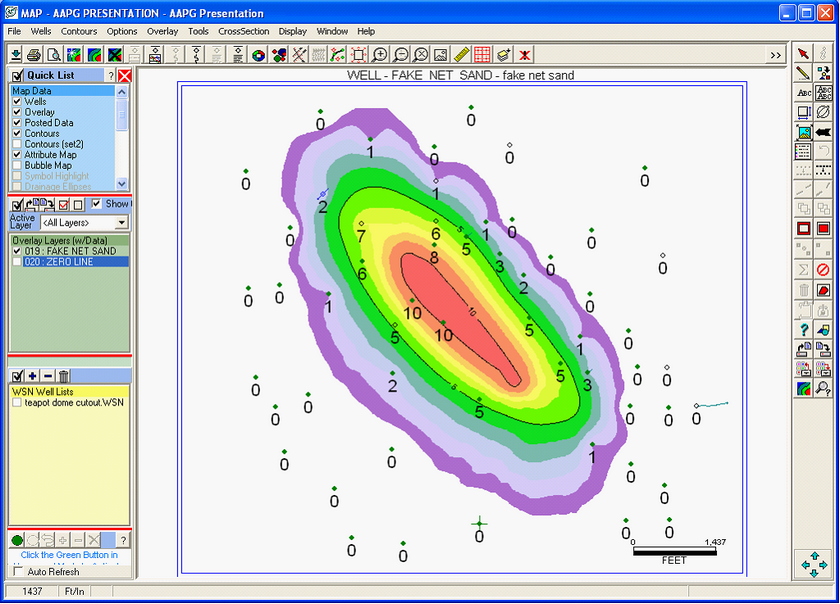
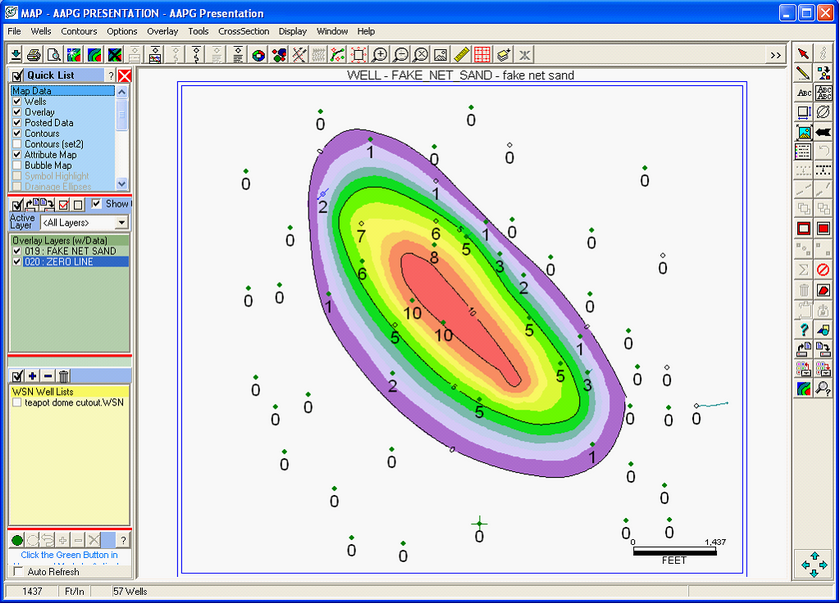
Zero Contour LinesThough the Adjust Zero Contour for Isopach Surface option helps to reduce grid artifacts around the zero line, hand drawn contours are probably the best way to create a smooth, realistic surface. To continue to use the computer generated zero contour line, its also possible to use a very small contour value (around 0.1).
Hand drawn control lines on an isopach (Left), the same isopach with a zero contour line (Right)
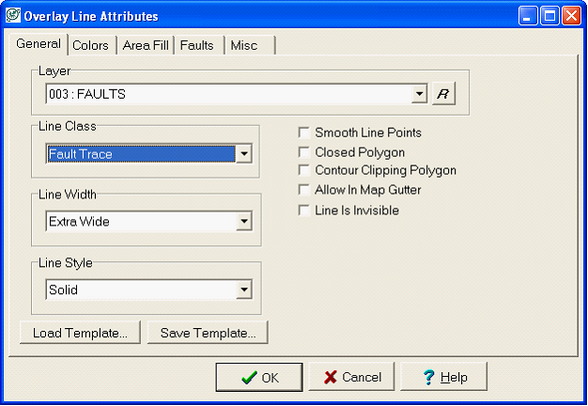
FaultsIn the Map Module, faults are treated as a special class of overlay line. Just like any other overlay line, faults lines have width, color, and an assigned layer. Unlike other overlay lines, however, faults have a special tab labeled Faults. This tab controls how fault symbols are drawn, as well as how Petra handles the fault during the creating a computer-generated grid. Since faults are irregular surfaces, Petra uses triangulation when creating a faulted grid.
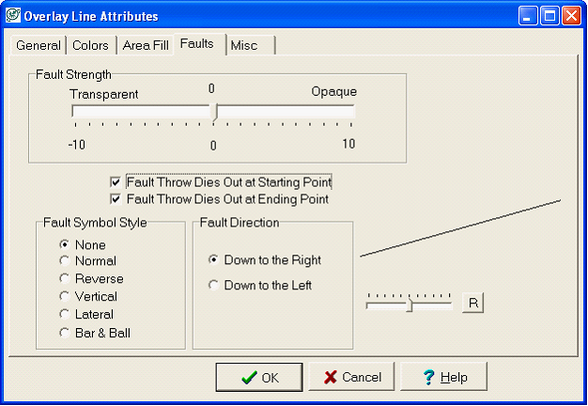
Setting an overlay line as a fault (Left), setting the fault strength and fault symbol (Right) High-angle, near-vertical faults are drawn as a line, while low-angle faults with aerially missing section can be drawn as two separate faults that form a polygon. Since computer-gridding can create contours inside these fault polygons (where the surface should be missing), its a good idea to blank these polygons out with an opaque polygon. Fault StrengthOn a hand-drawn contour map, a fault breaks contour lines. Put another way, a fault breaks a map into two different parts. Data on one side of the fault is only relevant to that fault block, and has less (if any) relevance to the map on the other side of the fault. Similarly, a drawn fault tells Petra to interpolate the gridded data up to the fault and ignore data across the fault. The opacity of the fault determines the strength of this break. A low opacity fault will still be largely connected, while a completely opaque fault will ignore data across the fault entirely. Practically, this means that the opacity of the fault influences both the faults throw and the amount of fault drag. High opacity faults have greater throw and more independent fault blocks, while transparent faults have lower throw and greater amount of fault drag. Completely opaque faults cause grid nodes to be nulled along the fault, which can create a saw-tooth effect of color-filled grid along the fault.
Fault strength's effect on throw and fault drag |