Capturing contour lines to the overlay |
|
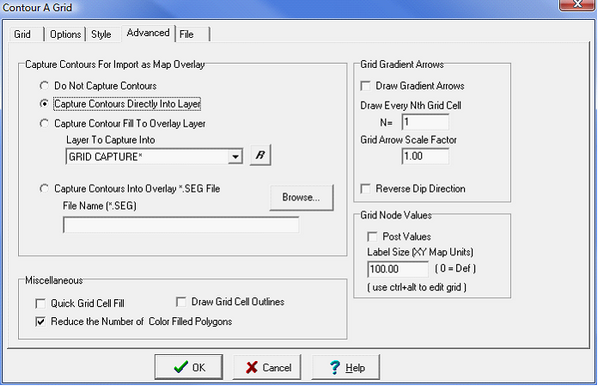
This method captures contour lines from a grid to an overlay layer. Once these lines are overlay contour lines, they are editable just like any other line. This technique can be useful for letting Petra build a quick first pass at contour lines, and then using an interpreters skill to modify them into a more reasonable geological interpretation. Depending on the complexity of your contours, this can be very labor- and time-intensive. For most contour maps, its almost certainly faster and better to hand-draw overlay contour lines from scratch. Under the Advanced tab, select Capture Contours Directly Into Layer, and then select the Overlay layer you want to contain these contours. The R button allows you to rename the layer. In the example below, the overlay layer has been renamed to GRID CAPTURE.
Capturing contours to the overlayUse the "Contours>Display Contours" menu and go to the "Advanced" tab. Choose the option to capture the contours directly into an overlay layer and select the appropriate layer. As the contours are drawn they will be stored into the overlay. Next, turn off the contours from the Contours menu. You should see the contours that are in the overlay. These contours can be edited as any other overlay item. Selecting the contour to be editedSelect the contour line to be edited using the ARROW icon located at the top of the overlay tool bar. The overlay tool bar is located along the right side of the mapping module window. It is displayed using the "Overlay>Show Tool Bar" map menu. After clicking the ARROW icon, click the left mouse button once on a contour. Selection is indicated by small squares drawn at each "control point". Double clicking the contour line will show the attribute screen as will clicking the overlay " attributes" icon containing a small letter "i". Changing the contour line attributesAfter selecting a contour line, double click any point on the line or click the "attributes" icon located in the upper right corner of the overlay tool bar. Adjusting individual contour line control pointsThe location of each contour line control point can be repositioned by clicking and dragging the control point using the left mouse button. Position any of the control points, then click the right mouse button to redraw the screen show the modified contour line. Adjusting sections of a contour lineEntire sections of a selected contour line can be adjusted, stretched or skewed using a rubber band splining technique in combination with the CTRL KEY. The process involves holding down the CTRL KEY and picking two anchor points with the left mouse button. The anchor points are identified by small Xs and define the section to be adjusted. The points between the two anchors can be dragged into position using the left mouse while holding down the CTRL KEY. Releasing the CTRL KEY can still move individual points. The section adjustment is maximum at the point be dragged and minimum at the two anchor points. New anchor points can be selected for the currently selected line by holding down the ALT KEY and clicking with the left button. Again, hold down the CTRL KEY to modify or drag the section between the anchor points. When done, either select another contour line or click the right mouse button to redraw the screen. Linking short segments of contours togetherOccasionally, contour lines are generated that are short in length and do not connect with other contours. A selected contour line can be connected to another contour of the same Z value if one of its end control points is close enough to another line. You can force two contour segments to be close by dragging one of the end points very near the end of the other line. With one segment selected, click the "connect" icon located on the overlay tool bar which looks like a black line with a red section in the middle. After joining, the control points of both segments will be highlighted. Breaking a contour into two separate segmentsA single contour line can be broken into two separate segments. When selecting the line, click on the exact spot at which the line should be broken. Then click the "break line" icon on the overlay tool bar. One of the segments will remain highlighted and the other will be off. Deleting a contour lineSelect a contour line and click the "delete" icon (trash can) located on the overlay tool bar. |
