Standard (Coordinate Systems) tab |
|
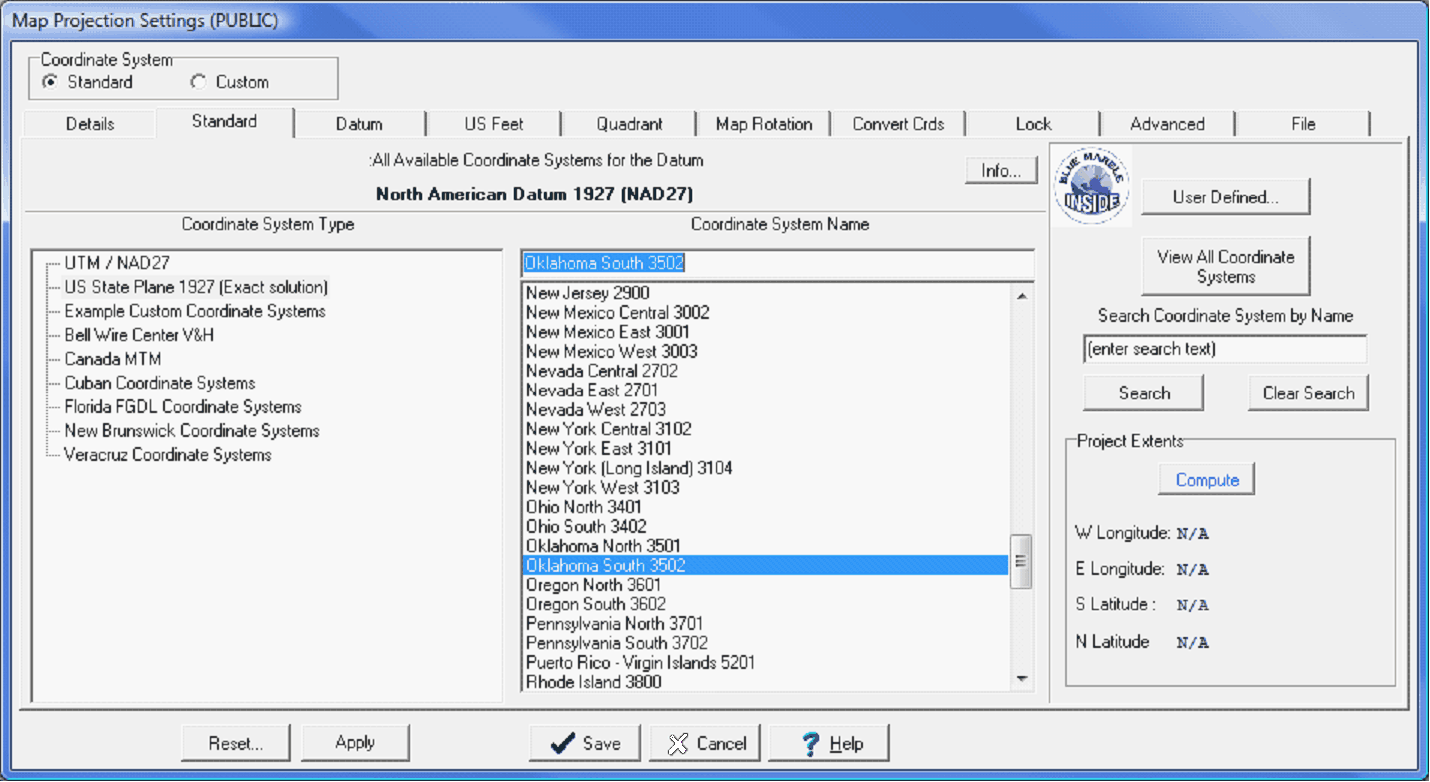
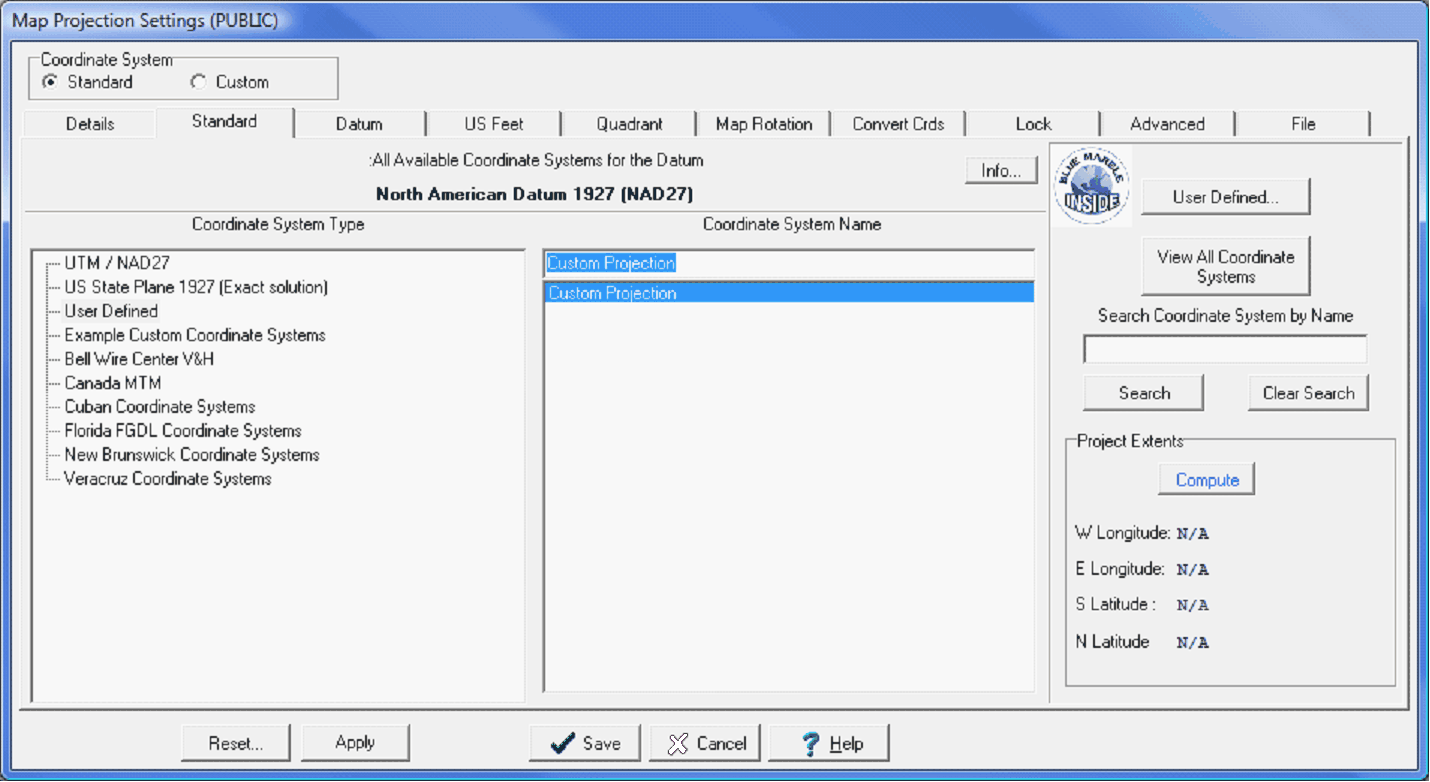
Petra can select a coordinate system in two ways: Custom and Standard. The Standard Coordinate Systems contains a wide variety of coordinate systems assembled by Blue Marble Geographics. This set of Standard coordinate systems covers the vast majority of projections used in the oil and gas industry. Both the Standard and Custom tab set a new projects coordinate system and also reprojects an entire project to use a different coordinate system (provided the reference datum stays the same). The Standard tab is primarily divided into two lists: the Coordinate System Types, and the individual Coordinate System Names. The Coordinate System Type list on the left shows all the different kinds of coordinate systems available for the currently selected reference datum (the projects reference datum is selected on the Datum tab). Selecting a specific coordinate system type populates the Coordinate System Name list on the right with all the available coordinate systems. In the example below, US State Plane 1927 is selected, which shows all available NAD27 state plane coordinate systems. In this example, the Oklahoma South state plane coordinate system is selected from the Coordinate System Name list. Its also worth noting that the Standard tab also has an option to create a custom, or User Defined coordinate system. See the end of this help file for more information on User Defined coordinate systems.
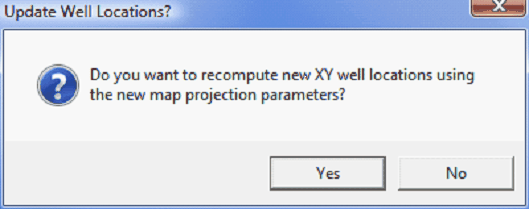
The Standard tab lists the available coordinate system types and specific coordinate systems for the selected reference datum. Select Save to enact the changes. For new projects this will simply set the projects map projection. For existing projects, saving a different coordinate system means that the XYs of all the data will need to change as well. Make sure to select Yes when Petra asks to recompute XY well locations using the new map projection.
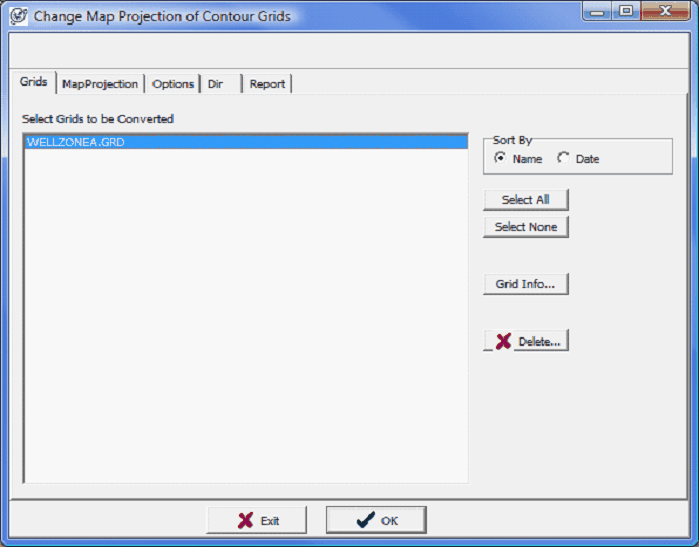
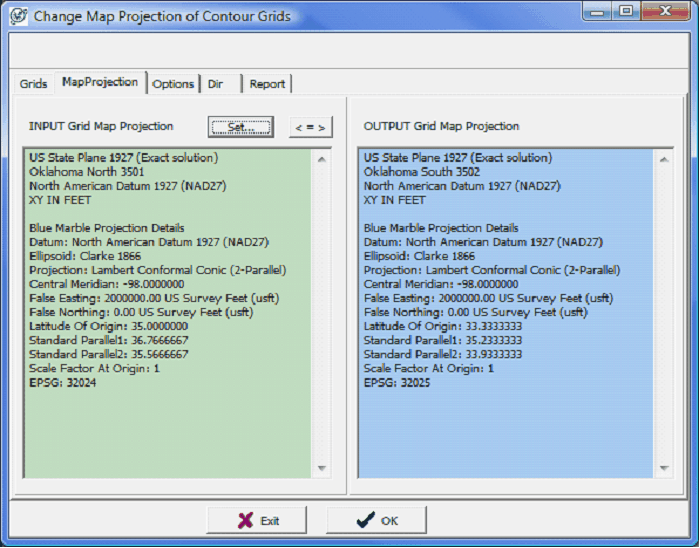
Changing the coordinate system changes the XY positions of wells. Select "Yes" to recompute the positions in the database. Final Steps for Changing the Coordinate System on an Established Project After changing the coordinate system and the projects map projection, there are a couple more steps to reproject other data inside a project. Reopen the map module, and verify that the well locations and overlay files line up correctly. It might be necessary to reset the data limits to reflect the new locations of the well and overlay data. To do so, select Display>Auto Scale Mode & Map Extents From Wells. The wells and overlay should now be lined up using the new coordinate system. The final step here is to reproject the grids. Select Contours>Grids>Convert Grid Map Projections. The Grids tab shows the grids contained inside the projects GRIDS folder. To change this directory, select the Dir tab. Next, select the grids to reproject. The MapProjection tab shows the map projection of the grids on the left in green and the new grid map projection on the right in blue. Notice that in this example, the grid was Oklahoma North (NAD27) and will be reprojected to Oklahoma South (NAD27).
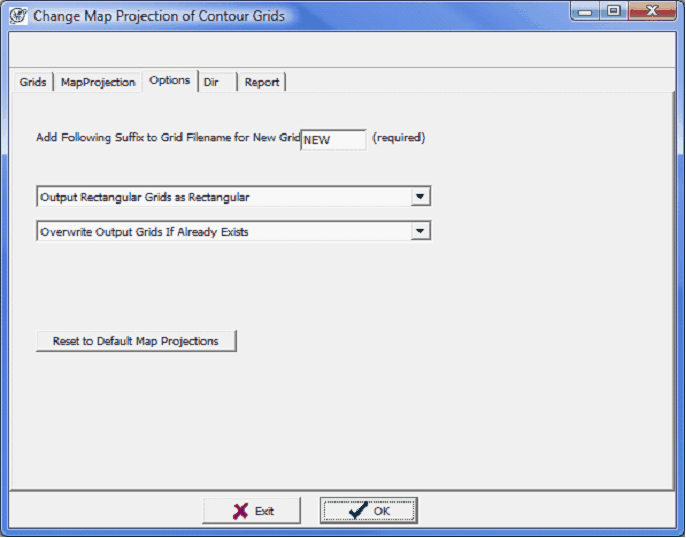
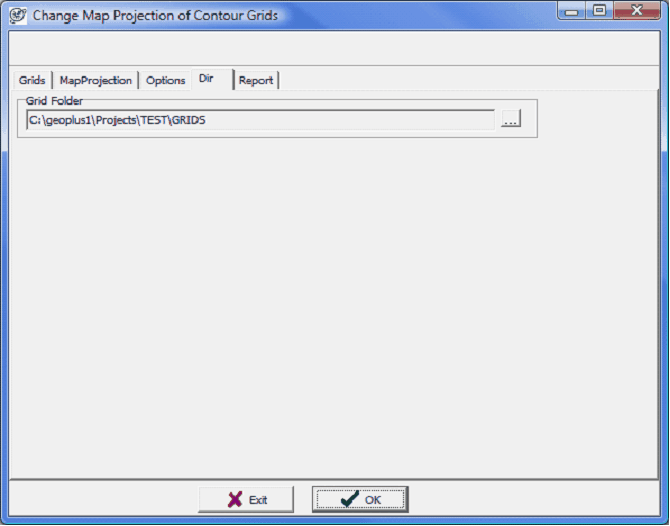
The Options tab gives a little finer control on how the grids will be reprojected. Petra automatically stores backup copies of all reprojected grids. By default, Petra adds NEW as a suffix to new grids. Its possible to change it by entering new text, but there needs to be some text here. This tab also controls how Petra resamples the existing grids to fit the new projection. You can output the newly reprojected grids as rectangular or triangular grids. The Dir tab changes the directory of reprojected grids. This tool will only reproject grids within this folder. If your grids are stored in multiple folders, its probably best to perform this operation several times to get all different folders. To reproject the grids, select OK. Petra will review the selected grids and generate a report.
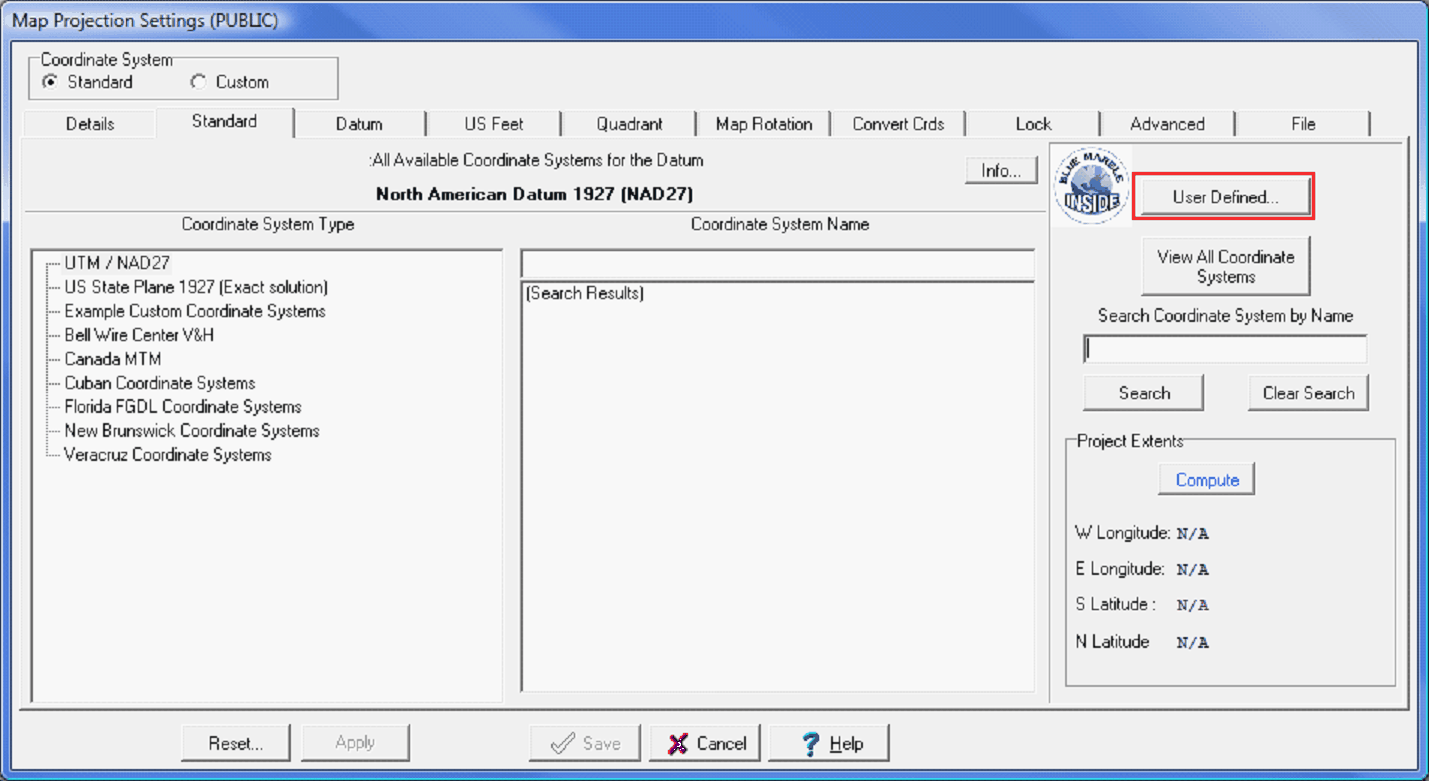
User Defined Coordinate SystemsThough the Standard tab is primarily designed to handle a variety of standard projections, its also fairly straightforward to create and save custom projections. Select the User Defined button on the left of the screen (highlighted in red).
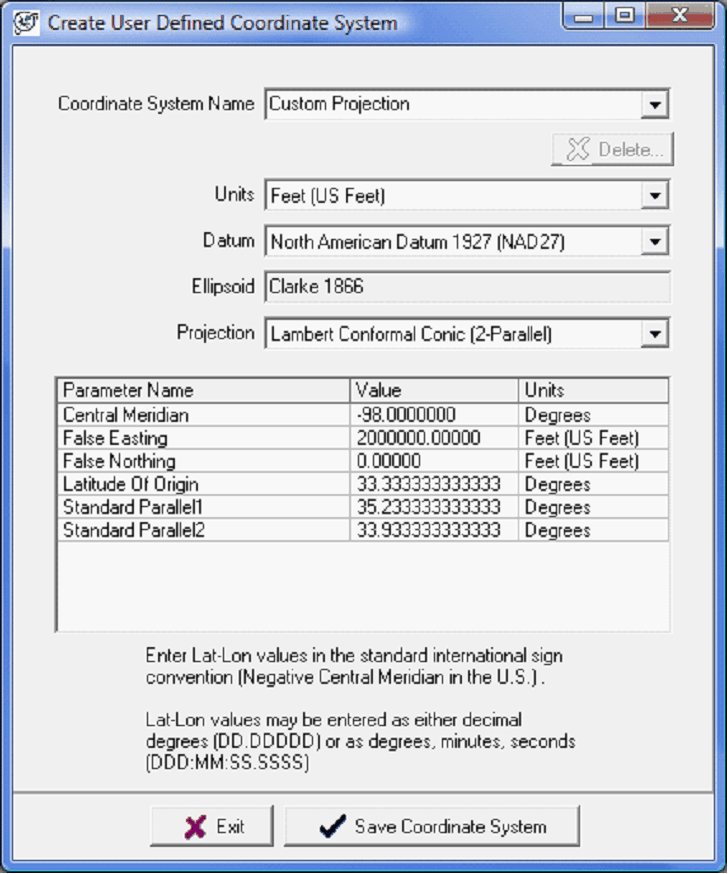
This brings up the Create User Defined Coordinate System box. Here, select a name, units, datum, ellipsoid, and specidic parameters for the map projection. Selecting Save Coordinate System creates the new projection. In the example below, the coordinate system is named Custom Projection.
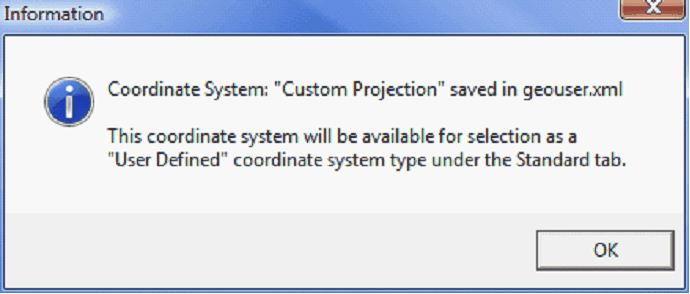
This saves the newly created user defined coordinate system inside Petras database. User defined coordinate systems are listed under User Defined on the Coordinate System Type list on the left of the screen. Selecting the custom coordinate system will select it for the project. Select Save to save the projection for the entire project.
|